Goldentone 7-40 complete restoration

frontpanel
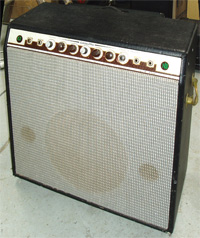
Today I'm going to start the restoration of this Gonldetone 7-40 Combo amp.
She looks pretty rough and I'm sure with a bit of work I'll have her looking like new again.
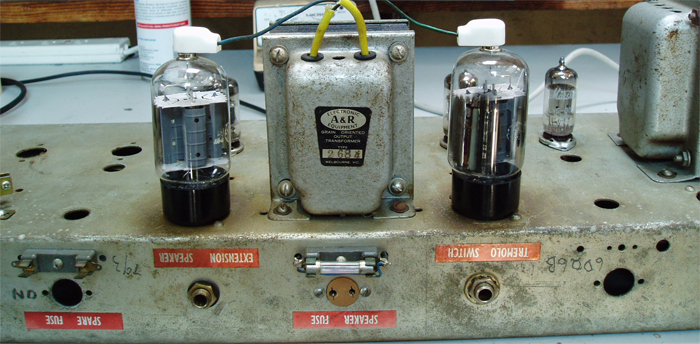
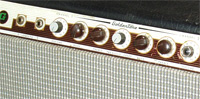
The amp came in with some mod's to the power stage i.e. 6L6's fitted instead of the original 6DQ6's that these amps came out with so I will have to hunt down some caps for the anode connections on the 6DQ6's supplied by the customer.
More on the electronics later.

Not being able to get the exact some Tolex and grill cloth as the original I'm going to use some Ivory Bronco Tolex as this color looks the closest to the original. For the Grill cloth the customer wanted black.

740

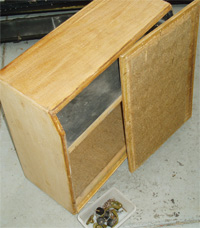
The first job required is to disassemble the amp completely.
That requires removing the chassis, speaker, baffle board, handles, feet etc.
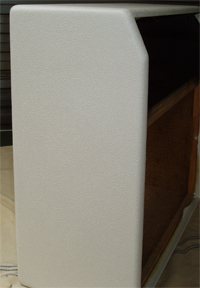
I'm going to work on the cabinet first. I need to get the surfaces smooth and flat for the new Tolex. This amp had a lot of staples holding the old tolex on and they all have to be removed.
Fortunately there was not a lot of glue so the surfaces prep was minimal and the top corners are good but the bottoms are a bit worn down. Fortunately being the bottom corners, and the worst ones being the back ones, you wont be able to see them.
Corners need to be smooth and in good conditions for the Tolex joins as this amp does not have metal corners to cover them if the Tolex corners joins are not spot on.
Small holes and dents in the cabs panels are filled and sanded.

stripped
The baffle board needs a bit of work, some of the outer layers of the ply have lifted and will have to be glued down  to get the surface flat. Now that the glue has dried I can give it a sanding and then a coat of black paint ready for the grill cloth. I've also painted the inside of the cab where the chassis is fitted just to make it look good. I have stapled on the grill cloth and it looks pretty good. see pics
baffleboardspeakerbaffle boardblack grill

I've checked over this beautiful old Wharfedale speaker for cracks in the cone, cone surround and spider and all looks good.
This old thing should sound pretty sweet as the paper cone is so soft compared to a new one. The speaker needs to be screwed to the baffle board and the jobs done.
Well I'm still waiting for the Tolex to come in, (one of the colors I don't stock so I will do some work on the chassis).

The Tolex has finally arrived and can't wait to get started on the job.
But before I start I will give the surfaces another check over and clean and prepare the Tolexing bench for the job.
I have to be extra careful with this color being so light as it will mark easily. Also the corners will be tricky and will need extra care to ensure a neat finish.
As you can see they turned out perfect. Next the handles, they are very grotty looking and I hate putting on old hardware on a new Tolex job so I will buff them up.
This is where all those years of working on cars in my early days comes in handy as i used to polish all my engine parts under the bonnet.
Now to Install the speaker, but first I will redo the wiring to the terminal as It looks a bit shaky.

speaker2corner

handleside
And now the chassis.
This amp has had some work done on it before as mentioned. Someone had removed the 6DQ6's and fitted 6L6's and so the anode caps were missing. I found some on the net and ordered them in. The Input sockets were corroded so they were replaced with switchcraft 1/'4" sockets. The pots were in good condition so they were cleaned and left as is. The valves sockets weren't to bad either but were cleaned as part of the job and the preamp tubes were good also. The anode caps arrived. They are ok but not as good as the originals. I removed the anode wiring from the tube sockets and soldered on the anode caps and installed the 6DQ6's with there new caps. Checked the wiring to the tube sockets and turned it on. Checked the bias on the 6DQ6's and found they were pulling 100 milliamps each and turned it off real quick. This amp is a cathode biased amp and I thought the amp had the wrong cathode resistor due the 6L6's being fitted previously. Checking the values with the schematic... they were correct. What could the problem be? On a closer inspection, while checking the voltages with my multi meter I noticed the screens were at the same potential as the HT. Normally these amps run about half the HT voltage on the screens! Turned out our 6L6 man wired the screen directly to the HT and bypassed the screen supply because the screen caps were stuffed. I fitted new screen caps and wired them to the screen pins on the tubes sockets and turned the amp on again. Screens now at half the HT (about 180 volts) and the tubes were pulling 50 milliamps each. Checked the output on the scope and all was good. The last thing to check was the tremolo and that all worked fine. To finish off the job I cleaned the front panel and installed some new white chicken head knobs and now she looked and worked great and ready for the cab

.
frontpanelcompletedchassisback

With all the individual components completed it was time to finish this amp off. I carefully installed the chassis into the cab and secured it with its side screws. The back board was next but I had trouble with the back screws split the frame as they were screwed in. I had to remove the back board and clamp and glue the frame. It won't be finished today. The next day the glue had dried and I was ready for the next attempt. I managed to get all the screws in without splitting anything. The back board was slightly warped when off but was pulled straight as all the screw were tightened up.
Finally finished! I plug the in the guitar and had a play. Sounded beautiful. Very happy with the result. So was the customer!

If you have an inquiry about getting your old amp restored send us an email. Check out our tolex and grill cloths

oldnew

Some more restoration before and after photos
5150case
5150white
studio bass before
studiobassfront after
studiobassbackbefore
studio bass back after
Gibson Explorer before
Gibsone Explorer after
Ampeg1
Ampeg back
Fender Bassman 70
Marshall Quad box